Sunday, March 29, 2015

My Top 10 Feline Feeding Tips.


My cat Magpie contemplates breakfast while perusing the passing food choices available 
on the others side of the windowpane.
There are few shortcuts to success in this march toward the final curtain call. When I talk to my clients about how to best care for their cat(s) I focus on essentially a very few topics.

I remind my clients that we really "are what we eat, and we get what we pay for."

For cats, the strictest of carnivores of all of our domestic species, the poorer the diet, and the more contained your cat, the more likely you are to have problems.

Cats are roamers and hunters. They are lean muscled inquisitive beasts who all roar loudly on the inside even if they purr quietly on the outside. They are built to eat flesh, and not chewy cookie like food, they are also less tolerant to the accumulation of adipose (fat) tissue then other species. They tend to accumulate fat around vital organs, like heart, and suffer significantly if that fat remains. The consequences are staggering and severe. Joint disease in 4 and 5 year olds when I typically only see it in 15 plus year old fit cats. Diabetes, the terrible consequences of this disease are often life-threatening and life-costing. Recurrent chronic infections, overwhelming amounts of urine that isn't always deposited in the litter box. Difficulty breathing, poor coat, inability to clean themselves leaving fecal matter stuck to the back of the rear legs and tail area. It is a sad reality that many cats struggle with obesity simply because we, their parents, are feeding them a poor quality kibble based diet.

Tigger presents for a pat.
Here are my recommendations for what and how to feed the felines in your life;

1. Rely on canned food and minimize access and quantity of dry food
A normal sized middle aged house cat (8-10 pounds) should be fed 1/2 of a high quality 5 ounce can twice a day. In my home for my 4 cats I use Science Diet. I vary the flavors to keep my cats interested and avoid problems posed by an exclusive single animal based protein. If your cat is used to eating only dry, and is currently overweight start at 1 can twice a day. If they aren't finishing it start to reduce to 1/2 can twice a day.
Confession Notice; The number of clients who tell me that "They cannot feed canned food," is ludicrous. When I ask "why?" The answer is almost invariably, "because I don't like the smell or the mess." I have trained myself to not respond the way my gut wants to. Instead, I remind them that the best diet choices available are freshly killed small rodents.

2. Offer 1/2 cup of dry food per cat a day. This should be age, lifestyle, and appropriate for any underlying disease(s). Again, in my home I use Science Diet adult feline. In general, most of my obese, diabetic cats have been on a poor all-you-can-eat food trough dry food. Worst yet, they are cartooned, day-glo foods with packages that look like these;


Cartoon logo, day-glo colors, and weird shapes,
the junk food telltale trifecta.


Drumstick and fish shapes, with filling..
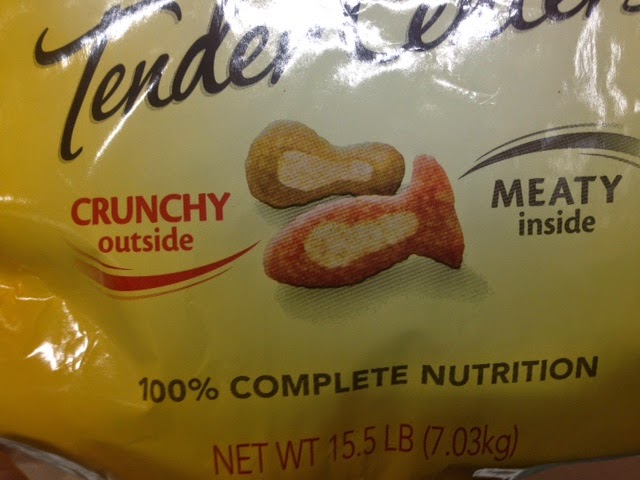
Filling and "soft inside, crunchy out"
and a cartoon character.


3. Choose a high end commercially available diet. My personal favorites are Science Diet. I have fed it to my cats for decades and I have seen this company stand by their product, their patients and my non-stop veterinary help requests for decades. (I am not paid, compensated, nor biased in any form by any company). I typically buy multiple cases of different flavors and offer a mixed variety to my cats. It is important to not feed one type, or allow your cats to become addicted to only one flavor or type. Having your cat find a favorite can lead to them becoming intolerant to any other foods and make a treatment of a disease by change in diet incredibly difficult.

4. Food and water bowls should be emptied and cleaned at each meal.

5. Pay attention to who is eating and how much they are eating. Too often we catch a sick cat after days to weeks of reduced eating. Free feeders are the most difficult to monitor for adequate food intake. If it is out all of the time many people don't know when, or how much the pets are eating until it they are very skinny and weak.

6. I love water fountains for cats. They seem to enjoy running water, and it encourages drinking. I also like to add cat grass to them. The cats often enjoy the greens and they are fresh and organic.

7. Any kind of diet change, especially for cats, can be difficult. The best advice is to do it so slowly and so gradually that they don't realize it is happening. For the first few weeks (or months if needed) leave the wet food out and gradually reduce the amount of dry available. If your cat is finishing all of the dry and demanding more give in, but try to make it the highest quality dry available. If they are being reluctant to try the wet add a tiny bit of canned tuna, or chicken/beef baby food, or even lunch meat. 

My cat Wren, takes a little love bite nibble.
8. If your vet advises that your cat should be on a prescription diet I would still recommend that you try a gradual transition. If you cat is not so keen on the new diet it is better to have some of the 'good' versus all of the 'bad'. Let them decide how fast you can transition them. If you are having a difficult time with the prescription food ask your vet about other options. In many cases there are a few different manufacturers and a few other options.

9. Cats are ALWAYS in charge. The old "eventually they will get hungry enough and eat it," is NOT TRUE for cats. Cats can, and do, go on hunger strikes that can lead to irreversible life-threatening liver failure or disease. Surrender before they prove their point with an expensive potentially deadly disease (hepatic lipidosis). If your cat is getting so finicky that they are refusing the best stuff, start feeding other stuff. In the end a cat has to be eating, and as disease, or age, advances feed them whatever you have to to keep them eating. Try the following; gravied canned foods, chopped cooked chicken, fish, shellfish, meats, hot dogs, baby food meat flavors, tuna, or any of the foods or treats from number 2 above. In the clinic we have a special 'junk food' section that we pull out as our secret weapon to encourage our sick cats to eat.

10. Embrace the challenge that is the independent intelligent spirit of a cat. They have their reasons for every decision that they make. They need more than most of us can offer in a life of jobs, kids, responsibilities, and convenient diet choices. Too often we are not meeting their dietary needs, their inquisitive curious minds, and their exercise stamina. I have become an advocate of lots of choices, loads of mental and physical stimuli and an appreciation that we, unknowingly, and unintentionally asked them to live a life of boring captivity. Take your cats for a walk (try a harness or an enclosed outdoor cat cage), or even a playmate to chase and play with in the house. What about a cat room with shelves on the walls, cat trees, and an indoor garden of their own?

If you have any tips, or thoughts on how to best care for cats please leave me a comment. If you have a pet care question please visit me anytime at Pawbly.com. Pawbly is a free open pet community designed and dedicated to helping pet people care for the pets in their lives.

I am also available for veterinary care at the vet clinic, Jarrettsville Vet, in Jarrettsville Maryland, or on Twitter @FreePetAdvice.

Saturday, March 28, 2015

Cat Dental Care. At Home Tooth Brushing Tips.

I made a video on how to brush your dogs teeth the other day. The first question that I was asked after it was published was about providing some tips for cats.

Now I am as honest as they come. I have four cats in my home, four at the clinic and I am as guilty as every one of my cat clients when it comes to brushing their teeth. It is awful, but it is true. The only thing that I do have going for me is that I check my cats teeth quite often..at least weekly. It is not half as beneficial as removing the accumulating plague and calculi that cause gum disease and tooth decay. I promise to do better.. we all have this day to make a difference in our tomorrows. No sense beating yourself up over the stuff you didn't do yesterday.

The biggest problem with all things in the cat care arena is the cat restraint and willing participant problem. The first video is about how to convince your cat to allow you to care for them, this is all about,

How To Restrain Your Cat.


The second video is on,

Cat Tooth Brushing At Home.


If you have a pet question, or would like a tip on how to care for your pet please let me know. If you have a pet question you can ask me, or the community at Pawbly.com.

You can also reach me on Twitter @FreePetAdvice, or at the vet clinic, Jarrettsville Vet in Jarrettsville Maryland.

Thursday, March 26, 2015

Simple Tooth Brushing Tips and Techniques..

CHEEEEZE
I firmly believe that if the important parts of our routine healthcare tasks were easy more of us would make the time to do them. Take for example, nail trimming, grooming, and tooth brushing. Today's topic is to simplify brushing teeth to encourage more of you to do it every single day.

Pet dental disease is the most common, most overlooked, and most easily avoidable of all of the pet care health needs that I see in the clinic.

If I told you that you could in almost all cases avoid the expense, worry, and need of anesthesia to clean your  pets teeth wouldn't you want to try?

For something to work, happen every single day, and be helpful it has to be quick, simple, and easy.

Here is my at home How-To on brushing your pets teeth at home.


Last Two Cents;
  • Focus on brushing the upper arcade of the maxilla (top set of teeth).
  • Use your finger instead of a tooth brush. This way you can feel where you are and get to the teeth all the way in the back. Keep poking your finger inside the upper lip towards the ear, there are little teeth hiding back there. These are one of the most diseased and overlooked teeth in the mouth (probably because they are so well hidden).
  • The tongue takes care of the inside surfaces of the teeth.. this is also super helpful because it keeps your fingers out of the biting zone.
  • Use your nose as much as you use your eyes and fingers. Bad breath is often caused by diseased teeth. If their mouth smells it's time to see your vet and inquire about a dental cleaning and possible extractions.
  • A dental without anesthesia is a waste of time and money. If you are so afraid of anesthesia that you can't bear a dental cleaning under general anesthesia start brushing now and do it daily. If you think that you cannot afford a dental under general anesthesia I would say that you probably cannot afford to NOT do it. A rotten tooth will cause pain and keep infection in the bloodstream causing detrimental effects to the entire body, especially their heart. Dental radiographs and probing of the teeth only happen under general anesthesia, along with extractions. Veterinary dental surgeries relieve pain, cure infection, and provide return to normal eating function.
  • I do not think that toothpaste is necessary. I find that it just causes most pets to lick, and you are more apt to get your fingers chewed on. If your pet thinks of tooth brushing as more fun because a tasty treat is involved, and it makes it easier for you to brush them, then squeeze away with the chicken flavored toothpaste and enjoy!
  • The objective is to stimulate the gums and remove the plaque, tartar and calculi that accumulates on the smooth surfaces of the teeth.
  • Make this daily chore a part of your daily routine. Keep a jar of gauze by the bedside table, coffee table, or kitchen table. As you prepare for bed, tv time, or dinner take a minute out to brush your dogs teeth.
  • Finish every brushing with a hug and a kiss. Every task is easier with love!

If you have a pet related question you can ask me anytime for free on Pawbly.com. You can also find me on Twitter @FreePetAdvice. I am also at the clinic Jarrettsville Vet in Jarrettsville Maryland.


Many Thanks to my friends, staff, Willow and her family for helping!

 Bitsy smiles for her grooming!
(She does have beautiful teeth though!)

Sunday, March 22, 2015

Scrotal Ablation, Diesels Nip and Tuck


This is Diesel. He is a 16 month old Newfoundland who was at the clinic for his neuter. He, as a giant breed dog, was neutered a little later than the usual 6 months old that we typically recommend to allow his body to grow. There has been some debate about when it is most beneficial time to spay and neuter the larger breed dogs. Diesel's family had also decided to neuter him and remove the excess skin of the scrotum. The older a dog gets the more the scrotum stretches. Some dogs have excessive scrotal skin and their parents elect to remove it at the time of the neuter. We call this a scrotal ablation.


Typically we neuter a dog by making an incision in the area above the scrotum and remove the testes through it. Testicles are attached to the body with two large vessels that are tied off and removed. It is not typically a difficult nor involved surgery,  but it does leave behind the sac of tissue that the testes used to live in.

For those male dogs that are neutered before a year old, and especially those that are smaller breeds, the scrotal skin will shrink and adhere to the pelvic area in the following months after the testes are removed. 

For those male dogs that we neuter later in life the scrotal sac can become stretched and a pendulous skin sac remains. This is in almost all cases merely a cosmetically unpleasing remnant that long haired dogs can hide easily. 

I have had some older shorter legged dogs whose scrotal sac became so long and pendulous that it became ulcerated and abraded to the point of needing to be surgically removed.


For Diesel's neuter the entire scrotum was removed along with the testicles.


The skin in the inguinal area is closed with ample skin sutures to hold the tension of an active dog. 


Diesel, the finished product.


If your dog has excessive scrotal skin talk to your vet about whether an ablation is also indicated for your dogs neuter.


At our clinic a dog neuter is $225 and the scrotal ablation is an additional $150. Diesel was also prescribed an NSAID for pain and inflammation and in  some cases an e-collar. The boys under 6 months old rarely investigate their incision sites, but those over 6 months might and we prefer for you to be ready to put an e-collar on and not wake up the next morning with an open incision.


I am happy to answer any pet questions, and they are always free, if you meet me atPawbly.com. Pawbly is a free open pet community dedicated  to helping pet people by educating and inspiring those of us devoted to our pets.

 I can also be found at the clinic, Jarrettsville Vet, in Northern Maryland. Or find me on Twitter @FreePetAdvice.


Friday, March 20, 2015

Wound Repair, Take Two. How To Treat Your Dog Fight Wounds.

Don't you agree that her wound doesn't look too bad?
That's a very common assumption, and unfortunately, its often wrong.

This is Whiskey, a rather rambunctious three year old spayed girl who is more likely to greet you with a loud, ferocious bark and fierce lunge forward to remind you to stand down, turn around, and visit someone else, than a offer a wag and a smile.

As fate will have it, if you yell angrily at enough other dogs one of them is going to meet your nasty bark with an arcade of teeth and leave you with a wound to your face and a subsequent needed visit to the vet.

Whiskey came in on a Sunday for a bite wound that she had received on Friday. Her family had thought that it was just a small scratch, and no one wanted to incur a vet bill, especially in light of Whiskey's poor attitude.

On Sunday's visit it was decided to try to take a conservative approach. Whiskey was acting normally, eating, drinking, breathing, ambulating were all normal, and finances were tight. We flushed the wound (muzzle necessary), and applied 4 staples to keep the edges together.  She was in and out of our door with the minimum treatment plan available. The cost for this visit, $75, (an exam and 4 staples).

The next day Whiskey's mom called to say that she was in need of some pain medication. She came by to pick up a prescription for an NSAID.

On Tuesday afternoon the staples were missing and the wound wasn't smelling so good.


Tuesday night we treated Whiskey's wound more aggressively. We clipped the wound, applied a numbing agent and tried to suture it closed. We could have sedated her but her wound was not deep and did not require a drain. It was also very difficult to suture so close to her eye so we decided instead to staple it closed (again). This time Whiskey went home with an e-collar to protect her face and prohibit her from rubbing or pawing at the wound.

Lidocaine jel applied to the wound to provide a topical anesthetic.

Here is a video of us exploring Whiskey's wound. Any wound that is deep or dirty should be explored under general anesthesia. General anesthesia also allows us to explore and identify pockets, embedded debris, compromised structures and remove damaged tissue to speed up healing. In some cases an old wound needs to be cultured to identify which bacteria is residing in it and help identify the best antibiotic to treat it.


After clipping the wound it was closed. We had a long discussion about how to best do this;

1. Allow it to close on its own. In some cases this is best. These include wounds that have already got a good bed of granulation tissue. Or wounds that are so large we cannot close them.

2. Close it with glue, sutures, a full closure of the wound. This is the fastest way to heal a wound, BUT, you need to be sure that you know what you are closing, and be darned sure you aren't closing infection IN.

3. Clean the wound with lots of flushing (we use a dilute surgical scrub, or diluted betadine if around the eyes), and then apply either a suture or a staple to keep the wound from opening up further. Motion on a wound prevents the new healing cells from being able to form a supportive structure to allow it to close.

Whiskey allowed me to place one suture (I prefer them because I can get larger pieces of tissue and hold the wound together better than a staple, which is shallow, will allow. Therefore, she has 1 very solid deep suture, and four staples. Because we did not sedate or anesthetize her I did not suture it closed from top to bottom.


Whiskey went home with;

1. Pain medication, 7 days worth, $30.

2. Antibiotics 10 days worth, about $40.

3. E-collar about $15.

Whiskey's bill at my clinic was $185, which included the above and lidocaine $15, repairing wound $25, and initial examination $60. 

I will recheck Whiskey in 1 week. She may need the staples removed then, or it may take almost 2 weeks.

Related Blogs;


A Pawbly member asked about how to treat their pets bite wound at home. I hope that this blog helps to explain why bringing your pet to the vet after a wound is so important. If you have a pet question, or any kind of pet experience that you think would help others, please join us at Pawbly.com. It is free and open to all pet lovers.

Any injured pet in the Northern Maryland area can find me at the clinic, Jarrettsville Vet, in Jarrettsville Maryland. Or follow me on Twitter @FreePetAdvice.

Thursday, March 19, 2015

Cat Dental Disease. How much does it cost and what does it entail?


This is Satin, a middle-aged domestic short haired cat who was found to have calculi and mild gingivitis on her last annual veterinary examination. Dental disease is one of the most common and most overlooked ailment that we see in veterinary medicine.

Dental disease can present in numerous ways, they include;

1. Drooling. Excessive saliva from the mouth.

2. Pawing or rubbing the face or mouth on things or using the paws to rub the face. Most cats doing this have brown matted fur on the inside of the lower front legs, or crusting of saliva on the chin.

3. Reluctance to eat. Trouble picking up the food.

4. Bad breath, or bad odor to the mouth.

5. Loose or missing teeth. These may be found, fall out in the food bowl, be seen projecting from the mouth at weird angles, or appear as empty spaces when they meow.

6. Dropping food from the mouth while eating. For instance they attempt to pick up the food with the mouth, shake the head, or drop the food. This is often caused by pain in applying pressure to the teeth to pick up the food and swallow it.

7. Weight loss. The pain or difficulty in picking up food causes weight loss.

8. Pain, or meowing when the face or head is touched.


Satin was deemed a Grade 2 with her dental disease. We use the grading scale as a way to explain and discuss the presumed severity of the dental disease.


Here are Satin's post dental cleaning photos.


Satin had a pre-op exam ($45) bloodwork and urinalysis ($130). Satin's dental included an i.v. catheter ($40), i.v. fluids ($40), anesthesia ($100), dental cleaning ($95), and post-op injectable 10 day antibiotic ($50). Satin also was microchipped ($10). Nail trims are free with exams and surgeries. He did not have any teeth removed. His total bill for his dental was $335.

Related Blogs;
Simba's Abandonment and Dental Needs.

How Much Does The Average Cat Tooth Extraction Cost?

If you have a pet question please find me on Pawbly.com. Pawbly is free to use and open to all pet people. Learn about your pets health, their behavior, and how to provide the things they need to flourish.

If you are in my neck of the woods stop by the clinic, Jarrettsville Vet and say "Hello." I am also on Twitter @FreePetAdvice.

Wednesday, March 18, 2015

Wounds on a Cats Face. Why Vet Care is Cheap and Effective.


This is Socks, a three year old domestic short haired, neutered barn cat.

I live in Maryland horse country and where I practice medicine it is not uncommon to have your horse barn guarded by rodent loving felines. Socks came to see me to help address a wound. Cats are fairly territorial beasts who cat fight when they are stressed, housed too tightly, protecting food, or generally feeling unsocial. In a county with a lot of horse barns, there are a lot of cats, and, I therefore see a lot of cat wounds. 


There are a few general consistencies with cats and wounds.

1. Cats prefer to fight with WORDS (hissing, spitting, growling, and some high pitched yells that are easily recongized and universally regarded as equivalent to nasty accusations about close family members and inappropraite accusations sure to raise the hair on even the most genteel being) and CLAWS and TEETH.

2. Claws and teeth are designed exquisitely to pierce flesh. The perfect shape and always sharpened to a dangerous point.

3. Those pointy sharp weapons can penetrate deep in an instant. One hit of the target is sure to puncture the skin and almost invariably will leave behind bacteria who are deposited in a warm well supplied host. It is the perfect scenario for infection to flourish.

4. To add insult to this injury, cats have a unique and somewhat disadvantageous preclusion to healing from punctures rapidly.

Let's review the scenario.
Pierce skin, embed bacteria, close skin, envelope infection in the most perfect place for it to proliferate and infect. And, so, not surprisingly, in about a week or two your cat has a big, swollen, infected bump. We call it an abscess. It is painful and it grows until your cats body can either kill it with their own immune system (puss is in reality white blood cells eating up the bacteria), or it ruptures and frees the bacteria to the world.

This is what Sock's wound looked like at the first glance.
Doesn't look so bad does it?
That's because the hair is hiding it.

Here is what I do for cats that arrive at the clinic for a wound examination.
1. You need to get a good look at what you are dealing with. For some cats this requires sedation. At my clinic sedation involves  an intramuscular injection and costs $40.

2. Clip and clean the wound. Hair gets embedded in the oozing wound and delays healing. It also helps get a clearer picture of what the wound looks like, for instance, how deep is it? How large is it? How much tissue is compromised? (See Whiskey's Wound for more information).


3. Flush out the wound. We use the old vet saying often; "The solution to pollution is dilution!" Flush out as much dirt, infection, and clipped hair as possible. We use a medicated cleaner, but betadine (diluted), or soapy water is ok, in almost all cases. (Note; if a body cavity is involved, for instance, into the chest, he abdomen, or the throat/neck area seek veterinary help immediately!)

4. Decide whether to close the wound, or not. There are a few general guidelines for this;

  • Don't close in infection. This is a judgement call not to be made by anyone except a veterinarian.
  • Don't close in compromised, necrotic, or possible neoplastic (cancer) tissue. These require surgical veterinary excision.
  • Understand which wounds need the help of a drain. In general, I place drains if I am concerned about closing in infection, or being able to loose access to flushing out infection.
  • If the wound has already begun to heal on its own. This is evident by formation of granulation tissue and the skin around it is looking healthy.


Socks has a good bed of healthy granulation tissue to his wound. He doesn't need surgical exploration at this time.

He does however need;

1. An e-collar to protect the delicate newly healing tissue from being traumatized.

2. An antibiotic to thwart off any residual infection. We gave an injectable antibiotic that lasts about 10 days. This costs about $30.

3. To be kept inside. As the weather is warming flies will search out an open wound and lay eggs in it. This is how maggots develop. These insidious parasites can kill a pet. Never allow a pet with open wounds to be kept outside longer than a few minutes. Flies can find them in seconds.

4. A rabies booster shot. He is due and we don't know the cause of this wound. Play it safe, keep your pets up to date on this disease that kills everyone it meets, and boost the vaccine if your pet has an odd injury that could have been caused by another animal.

Any cat that is lethargic, quiet, not eating well, limping, licking or rubbing any part of their body, has a swelling that appears hot painful or wet, or has an area of wet matted fur should be examined for a wound or abscess.

I know that many people think that "lancing the wound" will help treat the infection. While in many cases relieving the pressure of the infection will relieve some of the pain, it will be dangerous to do (to both you and your cat), and may not resolve draining the infection, nor will it treat the infection in most cases.

Socks exam and treatment was about $100.

If you have a question about your pet you can find a pet community of people who share information and experiences for the simple benefit of helping other pets, all for free, at Pawbly.com.

You can find me at the clinic, Jarrettsville Vet, in Jarrettsville Maryland, or on Twitter @FreePetAdvice.


Saturday, March 14, 2015

Ear Cleaning and Care for Chronic Otitis Pups

Absolutely, unequivocally, one of the most common pet problems that I see is ear inflammation and infection.

I spend a great deal of time with these clients trying to educate and empower them so that I will hopefully never see them back again with another ear issue. It is a tough sell initially to convince people to think of ear problems like they do their own dental maintenance and care. I don't have to do much talking to convince my clients that they themselves benefit from daily tooth brushing and flossing. They understand the correlation to daily care in the prevention of tooth decay and dental surgery, well, the same applies to ear care.

Ear infections are the huge problem and many of pets arriving for my evaluation of "bad ears" have had underlying issues for weeks, months, and even years. These ears are often red, painful and smelly.
Here is the cold hard truth about ears;

1. The first ear infection and inflammation episode is very unlikely to be the last ear problem that your pet will have. So, get educated and prepared for future episodes and yield a heavy handed sword in preparing for future episodes.

Yes, of course, some of these pets have an allergy component, and yes, almost all of them have a genetic component to their ear issues. For many pets the ears are the first allergy beacon to light up in the long list of clinical signs they demonstrate with their allergies. Some pets get red faces, red itchy ears, bumps on their belly, or an itchy butt, but most start with red ears. They are markers of the same underlying problem; an allergy. These are not infected but often benefit from a calming ear wash.  A pet with allergies should be worked up to reduce future episodes, but don't fool yourself there will be future episodes.

2. Get yourself all of the equipment and knowledge that you can from your vet so that most of the future flare-ups can be dealt with at home.

3. Believe that if you can keep your pets CLEAN, DRY, AND CALM that you can avoid almost all ear infections. Ear infections require antibiotics AND steroids. These are systemically absorbed and with time can cause long term adverse affects to include bacterial resistance AND immuno-compromise. You should always avoid these whenever possible.

Here is my at home instructions for cleaning ears;


And after you clean,, it is important to get on a scheduled ear maintenance routine.


I sell only big bottles of cleaners because if you are here for an ear problem you will very likely have an ear problem again soon, so I want you to be ready before you call me. They cost about $25.00.

My hope is that you won't ever have to call me again. My hope is that when your dogs ears start to bother him, (when he is at the initial inflammation stage), that you at home can clean your way out of the inflammation stage and avoid the (next) infection stage all together. My job is to educate you enough that you can keep your pet healthy and avoid seeing me.


OK, here is the "primer" on ear cleaning. If all else fails, read the label! The label on our ear cleaner reads. "Fill ear canal until overflowing and then gently massage into ear. Let pet shake out excess." See? Very simple. No poking, no swabbing, no fighting, no biting, and no hurting. Now, many pets have ears that hurt, so anytime you touch a painful ear you are hurting your pet. I don't want the ear cleaning to be a torture process that your pet hates because then it won't ever get done. So be gentle, be patient, and don't scare or upset your pet. 

For the first few times it is a two person job. The first person holds their right hand on the pets collar and left hand firmly on the nose. Keep the nose up and don't let your pet fight out of the position hold. Be firm, be kind, be patient, be gentle, and don't let your pet fight. The second person then takes the ear flap (aka pinna) firmly and gently pulls it straight out away from the face. (Perpendicular to the eye so that you open the "L" shaped ear canal into more of a straight line). Then fill the ear with the cleaner until it overflows. (No one ever uses enough). You want to "FLOOD" the ear canal, and that's another reason I sell the big bottles only. Remember your pet's ear canal is about 3 inches long. You need to get the cleaner to fill the whole canal. Then fold the ear flap like a burrito (always a reference to food ;-)), and massage into the head. You should be massaging against the skull and you should hear a squishy sound. It is the same concept as the agitator in your washing machine. This should not hurt. Actually, most pets love the ear massage. If it hurts then it means one of two things; 1. The ear is infected and you need a vet appointment, or 2. The ear drum is ruptured and you DEFINITELY need a vet appointment. 


I don't want owners to swab the ears because if the ears are red then the swab feels like sandpaper. And a dog with a hurt ear won't want to let you clean them ever again. And, the other reason we don't swab is  that we are trying to get rid of the junk in those ears, not shove it back down the ear canal. Let your pet shake out the excess ear cleaner and the junk that is causing the problem. 

I also tell people that you cannot over clean, but you absolutely can over medicate. I don't care if you clean the ears daily. Some pets need daily cleaning, some weekly, some yearly.


Make every part of your pet care fun. Never instill or participate in a stressful or anxiety ridden endeavor. It will only make the next time more difficult. Ears are a part of life, so face it, and conquer it with a plan and a belief that love and kindness conquers all.

If you have a pet question you can ask it for free at Pawbly.com. Pawbly is a place to educate and inspire pet people and it is always free to use.

If you would like an in person ear cleaning you can find me at the clinic, Jarrettsville Vet in Jarrettsville Maryland. I am also on Twitter @FreePetAdvice.

P.S. Many Thanks to my Jekyll-pup for being such a good by when his mom tortures him with You Tube demos.. (it is a rough life to be a veterinarians pup).

Friday, March 13, 2015

Seroma, The Pocket of Fluid to Keep Quiet


This is Molly, a bouncy and bubbly six month old Rottweiler who was spayed at our veterinary clinic about a week ago.

I talk often about how important it is to have a good history and a guardian who is attentive and watchful. It really can make all the difference in the world when you want a fast and economical diagnosis, which is imperative to tailor a successful (and the most affordable)  treatment plan.

Molly's mom noticed a baseball sized soft fluid filled "bump" at her spay incision site a day ago and brought her in to see me.


I have spoken about masses, lumps, and bumps often here. I always stress how important it is to not diagnose them based on a photo. You see a patient is more than the bump they are attached to. They are the storyteller to your puzzling problem. To find the answers quickly it is helpful to have a medical record, a loving pet guardian who pays attention, and a vet who is a part of your pets short and long term care.

Here is how I approached Molly's water balloon looking belly bump:

1. History: Spayed two weeks ago here. It is very helpful to know who spayed her, what surgical protocols were used, and how the patient did during their surgery. This is available through the patients record and the surgeon. This is hugely important when you think about where to have your pets care provided. There are lots of wonderful surgical facilities around us, but knowing this information is extremely helpful for any post-operative questions or concerns.

2. Examination: Molly doesn't seem to like either restraint, nor, me touching her belly. This is where the benefit of an inpatient examination and not diagnosing from a photo has the real value of a good client-patient relationship. Molly was bright, playful, had a normal temperature (very helpful in assessing infection) and seemed to be acting completely normally..but that belly bump needed to be classified and Molly wasn't convinced that this was any fun.


A wiggly girl is somewhat difficult to assess with just your hands. Every time I touched her belly she got tense. When palpating we use our fingers to "feel" for texture, consistency, and help our head decide what our hands are seeing.

The big dilemma with these cases are;

1. Is the incision (both the abdominal wall and the skin incision intact? This can only be assessed by your vet. There are two layers that are incised to get into the abdomen; the skin, and the muscle of the abdomen. These are ALWAYS sutured closed separately and must be assessed independently by a vet. If the skin incision is opening we often will staple or glue the edges closed, and place a e-collar to curb the pet form licking or chewing it open any further. BUT, if the abdominal wall is opening we go have to go back in and close it. If you don't the intestines can spill out of the abdomen and get trapped between the layers. Intestines are squeezing, flexing, highly active tubes, like writhing, slithering tentacles. They get into trouble if not kept contained. They twist on themselves and strangulate. This can lead to death of the intestines and cause death to the pet.

2. If these incisions are intact where is the fluid coming from?

I could palpate Molly's incisions and knew that they were all still completely intact. She did allow me to do this. She was however not so patient with my fingers probing her belly fluid pocket.

If she was a quiet patient I would have summised based on all of her clinical findings that she did not have an infection.... but she kept squirming and protesting to my probing... so I did the next best thing.... I drew off a sample.


This is what we call "serosanguinous" fluid, or blood tinged serum.


And, now Molly had a diagnosis; Molly had a seroma. A seroma occurs after a surgery has been done. The body planes (the example here is the abdominal wall and the skin layers) have been separated and the body doesn't like empty or dead space so it tries to 'fill it in' by adding fluid. The result is a collection of fluid between the layers of skin and muscle. It should be 'quiet' or non-painful, soft fluid, without heat or other signs of infection associated with it.

My treatment of choice for a seroma is to just leave it alone. The body will slowly reabsorb the fluid and it will eventually shrink until it looks completely like it was never there to begin with. It is in essence a cosmetic lesion until this happens. This resolution of the seroma can take weeks and should be monitored for infection during this time.

Some people think that drains being placed to allow the fluid to drain continuously are a good option, but, I am not a big drain fan. Drains allow stuff to crawl and seep into the space that is now sterile and clean. The whole point of all of this detective work was to identify infection, and now we are going to leave a highway open for it? These days I only place drains to remove infection. Another point to consider is that the body will often keep making fluid if there is a space to fill, so the drains allow the body to keep the fluid factory in business. That is a big mess to deal with for about two weeks. If we attempted to put a needle into the seroma and pull off all of the fluid it will refill in a few hours,, so this is almost always futile. There are a few occasions that you cannot outsmart or speed up what the body wants to do. You just have to let it heal on its own and on its own time.


Molly's plan is to keep an eye and a hand on her incisional seroma daily. If anything changes, to include her behavior, activity level, or eating enthusiasm we will re-check her. Like all of my patients she left with a plan  and my email.

Molly's spay cost was; $250.
Her re-check was free, (we usually do not charge for post-operative rechecks of our patients).

Post publishing note; I receive many inquiries on Pawbly about this condition.
Here is my advice;

  • Your vet should be seasoned and comfortable helping you manage this. 
  • It is my firm opinion that drains are not indicated to correct it, and, that they have potential to do more harm than good. 
  • If your pet has a seroma after a routine surgery (say a spay) it is most likely because the vet undermined excessive subcutaneous tissue. I do not believe it is the clients responsibility to pay for post op complications if the vet is at fault. This is a tricky thing to prove, BUT, a responsible and experienced vet has a much less likelihood to cause a seroma. Ask about your vets experience level before surgery. If you use a high volume clinic you are responsible for any post-op complications. It is the inherent risk of not knowing your vet. Seromas are in my experience a novice surgeons complication. (This applies to routine surgeries).
  • Diagnose before guessing. Your vet is there for this. Make them a wager at the beginning of your exam. Let it go something like this,, "Doc, before you stick that needle in that want to make me a wager? If it is a seroma from the surgery she had here I am not paying for this exam. Right?" Now mind you You should be willing to promise that you kept her quiet post-op.
  • After the diagnosis of a seroma it is not realistic or in the best interest to restrict a pet to a cage. I know this advice is provided often, but it is not fair to the healthy active pet. A seroma IS NOT A CONSEQUENCE of a failure of the sutured incision. These pets should not dehisce. They need monitoring, quiet activities without over exertion BUT the post-op instructions should not be any different than the patients who don't have a seroma. Cage rest makes everyone crazy UNLESS they are systemically ill or the suture/incision, or closure is in jeopardy. 
  • If your vet is asking you to pay for a drain ask them for an explanation, discuss the size of the incision, the difficulty of the surgery and understand why and how this happened. If finances are tight decline the drain IF your pet is happy, healthy and acting normally.
  • Expect the seroma to take weeks to resolve. 
  • Let your pets attitude and behavior dictate if more invasive treatments are warranted or needed.


If you have a pet question of any sort you can find me trying to educate and inspire other pet people at Pawbly.com. Pawbly is a free open community built around all things pet. Please visit and share your pet knowledge with others.

I am also on Twitter @FreePetAdvice and at the clinic, Jarrettsville Vet in Jarrettsville Maryland.

Tuesday, March 10, 2015

The Deep Foot Pad Lacerations. What To Do, and When To Do It.


Remington
This is Remington. A 5 month old Great Dane puppy. He came to see me on a busy Sunday afternoon. He is a big, clumsy, goofy, sweet inquisitive pup who lives with his equally energetic brother (truly his brother) and a household full of dogs.

This particular Sunday was the early part of March, about three days after the last foot of winter snow had been dumped on us. The sun was convinced Spring was summoning Winter to fall back and the last two days were warm and welcome. The result was a snow covered landscape with a layer of ice to insulate.

Normally this is not a problem for dogs. Dogs develop hard keratinized foot pads which are both durable and grip terrain, save for the young-uns. The young pups haven't beat the foot pads into a thick tough shell impervious to tree branches, sharp rocks, and certainly not sharp icy edges.

On a quick romp in the snow Remington returned with this laceration.


Which was this deep.. all the way through the skin of the foot pad.


Wound Care 101;

1. Stop Bleeding,
Here's the deal with skin wounds... Skin bleeds a lot! The best way to stop every kind of bleed is with firm direct pressure. After the bleeding is under control it is time to get a clean wound.

2. Get Clean,
The best way to clean a foot wound is to soak the whole foot in an antibiotic bath. We typically use either dilute betadine or chlorhexadine wash, but at home soapy water will do about as much good as any fancy medical grade wash.

3. Protect the Wound,
For pups this is best accomplished with a bandage. But beware, out of sight cannot include out of mind. Bandages require due diligence in keeping them dry and clean. A wet bandage needs to be changed immediately and if your dog begins to limp or lick at the foot they are telling you that something under that bandage is brewing. See your vet often.

After about a 5 minute soak we dry the foot and apply a soft thick bandage.


Foot pad lacerations are notoriously difficult to manage. I always try to manage these by second intention healing. This is essentially allowing the wound to heal on its own without surgical intervention. I know it sounds counter intuitive, but it is almost impossible to keep the foot pad quiet enough to not allow the sutures to pull through.

The bandage should be changed daily until the wound is well scabbed over. I send my clients home with;
1. Bandage supplies, about $15.00
2. Foot soak solution, about $8.00
3. Antibiotics, oral, about 14 days worth, about $25.00
4. NSAIDs for pain and inflammation a few days worth

I also make a homemade bootie protectors..


These wounds should be kept clean, bandages need to be kept clean and dry and the pet should be kept as calm and quiet as possible to minimize stress on the laceration site so it can heal.


And a kiss always helps speed up the healing process.


If you have a pet question you would like answered, or you have a pet experience that might benefit other pet lovers please join me on Pawbly.com. Pawbly is a free open community to help pets and their people. It is free to use.

You can also find me at the clinic, Jarrettsville Vet, or on Twitter @FreePetAdvice.

Sunday, March 8, 2015

How To Pill A Cat

Here are some of my pointers on how to pill a cat.


It is very important to always handle your cat in a calm manner. Never get upset and try to minimize stress. If you are calm, gentle and persistent you can easily master this important pet health task.

Here is how I hold cats..

Surround the cat with your body. I sort of tuck them in under me and hold them close while petting and speaking calmly to them. Ideally you want them to remain calm and relaxed for the entire task, start to finish. This will make pill number 2 far easier,, and pill number 23 actually possible. It might take a few minutes to get them used to being restrained but stick with it and don't get upset if it takes a few attempts to convince them that you aren't going to hurt them.


I lay my right arm from elbow to hand along the cats spine. This allows you to place gentle pressure on their body therefore keeping them from trying to roll or flop over.

Safe cat handling involves controlling the head, so they can't bite you, and controlling the feet so they cannot scratch.


I then grasp under the eyes with my thumb and middle finger. Now I am controlling the face.

Gently bend your wrist so that the head goes towards the ceiling. As you do maintain pressure on their body with the rest of your arm. As the cats head goes to the ceiling their bottom jaw will open slightly.


With your other hand place very gentle pressure on the mandible pushing down. Do not put your fingers in the mouth. You will get bitten..


Then drop the pill down the center of the mouth. A quick lick or sticking out of the tongue indicates it has been swallowed.


After you get the pill in a quick cuddle and pet makes it all seem like it wasn't so stressful after all.


The best way to coerce your cat into doing anything is to let them feel like they were not forced or restrained and make into into a fun bit of play and snuggling so that they don't put up as much of a fuss the next time.

If you are really struggling ask your vet to give you some pointers, or ask the vet tech to show you in person. They are a wonderful source of help and information.

If by chance the pill gets spit back out give your cat a few minutes of time out and try again.

Pill pockets are also a helpful trick. But try to use one hand for the pill and the other for the pill pocket so that they don't smell pill residue on the pill pocket.

For pet questions please find me on Pawbly.com. It is free and open to all pet lovers.